


1.
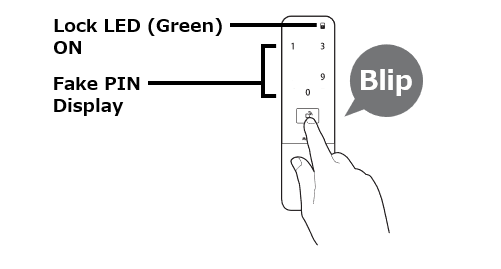
Press the start button twice to light the lock LED (green).
2.
When Fake PIN display setting is "On," 2 to 4 digits will light up, so press all the lit digits.
3.
.png?width=473&height=217&name=image%20(1).png)
When the numeric keypad appears, enter the passcode you have set and press "E" at the end, the unlock LED (red) will light up and the unit will unlock.
③Physical key (Lock/Unlock)
.png?width=226&height=275&name=image%20(2).png)
Remove the cylinder cover and lock/unlock with the physical key.
④Easy-lock (Lock)
.png?width=374&height=293&name=image%20(4).png)
When Easy-lock setting is "on", pressing the start button with the door unlocked will light the lock LED (green) and lock the door.
●Knowledge
Easy-lock is not available when Block Prank is set to "ON".
⑥Thumbturn (Lock/Unlock)

To unlock the thumbturn, turn the thumbturn while pinching and pressing the switch for unlocking the thumbturn. Turning it the other way locks the door.